How to Install LED Strip Lights – with step-by-step video tutorial
How to Install LED Strip Lights – with step-by-step video tutorial

LED strip lights have revolutionised the way we light up our homes and office spaces, thanks to their versatility and many benefits. Whether you’re looking to add ambient lighting to your kitchen or commercial space, or you need some task lighting for your office, LED strip lights allow you to transform any space with a stylish and cost-effective lighting solution. Plus, because no previous electrical knowledge is required to install LED tape, it couldn’t be easier to create the effect you desire.
Simply follow this guide to find out how to install your LED strip lights yourself. We'll cover:
Choosing the right tape for your job

LED tape is available in a full range of colours, such as amber,blue, green, pink, and red, as well as a variety of temperatures, including cool, neutral, and warm white. If you don’t want to stick to just one colour, you can choose colour changing strip lights instead. LED tape also comes in different wattages — usually from 5 watts to 25 watts — which determines the brightness of the lights (measured in lumens). So, there's a wide range of LED strip lights that will help you achieve the look you're going for.
LED strips typically have an adhesive backing for easy installation and can easily be cut to various lengths from their five metre reels. When choosing the light strips that you wish to install, it's important to consider the width of the tape compared to the width of the area you want to install it on. You'll also need to look at the number of LEDs per metre, as this determines whether the light is evenly dispersed. Although tapes with a higher number of LEDs per metre are slightly more expensive, they do not produce any unwanted spotting effects.
LED light strips can warm up slightly when they’re switched on so, ideally, they'll need to be installed on a metal surface to help dissipate some of the heat. If your LED strips won't be installed on a metal surface, we recommend placing them in a profile before mounting them to the surface using brackets.
How do you power LED strip lights?
Most — if not all — LED strip lights can be powered by the mains power supply. But, because UK mains power has a higher voltage and current to what is necessary to power LED tape, you'll need to install a driver to lower both the voltage and current. Take a look at our guide to find out more about what a driver is and what driver you need.
Installing LED strip lights
Installing LED tape is very straightforward, although some basic wiring may be required depending on the type of tape you are using.
How to connect LED strip lights to mains power supply

Most LED strip lights are sold on 5m reels (nd require some basic wiring. To install mains-powered LED strips, you will need your reel of LED tape, a compatible driver, and a compatible LED connector wire. Alternatively, our LED strip light kits come with everything you need to get started. Then, follow these steps to connect your LED strip lights to your power supply.
- Connect the LED tape to the connector wire by inserting the end of the tape into the clip on the wire, being sure to match the red wire with the '+' sign on the tape and the black wire with the '-' sign.
- Firmly press the back of the connector clip to close the clasp. You may have to remove some of the backing strip on the adhesive side.
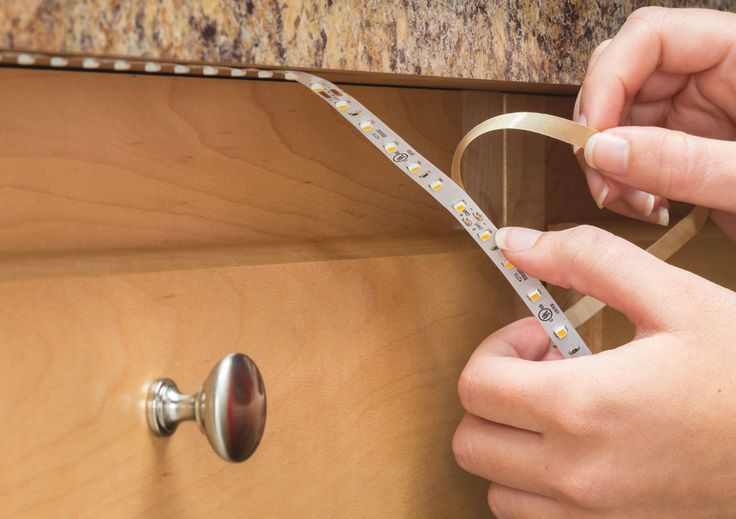
- Remove the adhesive backing of the tape and firmly press it onto the surface of your choice, whether it's your ceiling, wall, or underneath a counter.
- Connect the other end of the connector cable to the driver. Alternatively, you could try our range of ready to connect and easy to use tapes. These light strips come with a pre-attached jack that directly plugs into a corresponding driver.
- Plug the driver in to the power supply and switch the mains power on.
Or, just follow our how-to video below:
If you've chosen strip lights from our Tagra OptiProfile range, their new pro connect system and slim design makes installation easier than ever before — even in the shallowest of profiles. This simple connector allows you to extend the cable length from the tape to any size you require, without having to do any soldering and without any additional connectors. The connectors are added to both ends, which means you can effectively use two lengths of LED tape.
How to install LED strip lights on a ceiling or wall
LED strip lights can look great on your ceiling or walls as a stylish feature, creative task lighting, or to highlight the architecture of drop-down ceilings or coving. To install your LED strip lights on a ceiling or wall, you'll need to make sure they're installed behind a lip, such as the edge of a drop-down ceiling or at the top of moulded coving. This will hide the LED tape but still give you the full lighting effect for a much sleeker look.
How to install LED strip lights under cabinets
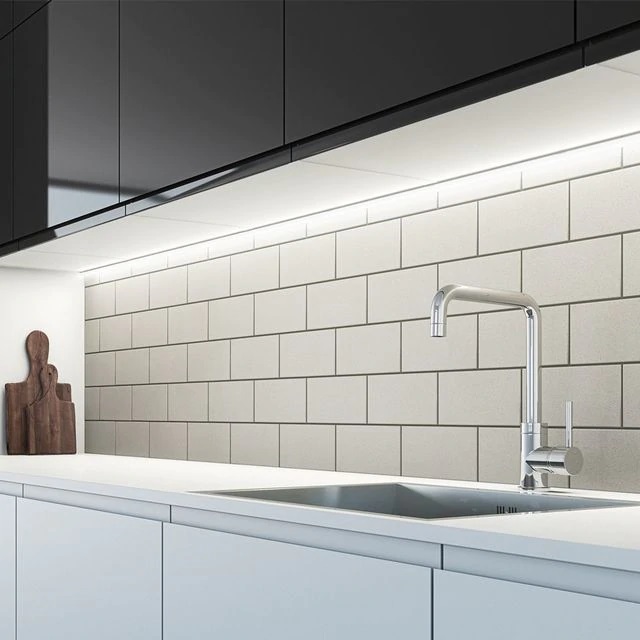
LED light strips also look great when installed under cabinets as task lighting. Although you should try to place your strip lights behind a lip, most cabinets are deep enough to place the tape quite far back. Again, this will ensure you get the full lighting effect, without having to see the light strip and wiring.
Installing LED strip lights outdoors
If you want to install LED tape outdoors, you'll need to buy light strips and a driver with an IP rating of at least 67 to ensure they're waterproof. These work just like their non-waterproof counterparts, so they're just as easy to install by following the video method above.
How to connect multiple LED strip lights to one controller
If you're using colour changing LED tape, then you'll need to connect your light strips to a wireless controller using a receiver. This should be connected between the LED tape and the driver. If you want to control more than one light strip with your controller, you'll need to add multiple receivers.
How to connect LED strip lights together
If your project requires LED tapes that are more than 5 metres long, you can easily connect multiple strip lights together. However, linking them together with a connecting wire will cause a voltage drop as the current runs from one light strip to the next, and your lighting will get dimmer as it travels down the circuit. Instead, you'll need to connect all of your LED strip lights to the driver separately by connecting one end of each tape to the device using an LED connector. Alternatively, you could use a cable splitter which works in the same way, but only requires one wire, which is best for drivers with only one outlet. Both of these methods will ensure there won’t be a drop in voltage.
LED strip lights are perfect for a wide range of applications and, by following the tips in this guide, you can install them quickly and easily.
Here at Ultra LEDs, we have a whole selection of LED strip lights to choose from. Take a look at our white, coloured, and colour changing strip lights, as well as strip light kits, which have everything you need to install your lighting. For more expert advice, take a look at our other buyer's guides. If there's anything you'd like to ask or discuss with us, you can call us on 0800 088 3300 or email us at enquiries@ultraleds.co.uk.


